Collection Deploy Tool
What does this tool do?
This tool lets you deploy an app collection to the Compute.build server without having to open the platform. You can integrate it into your own scripts or use it with CI/CD automation tools (like GitHub Actions) to automate your deployments.
How to use?
Prerequisites
- Python 3.11
- uv
Installation
- Download the zipped tool here. Save it on your local machine, and extract the contents into the root directory of your app collection.
- Open a terminal/command-line window in the root directory of your app collection.
Info
The tool is managed with uv: it declares its dependencies in its own
pyproject.toml, and uv run (see Usage) installs them into an isolated environment automatically
the first time you run it — there's no separate install step.
Tool Structure
collection_deployer/
├─ collection_deployer_helper.py
├─ main.py
├─ pyproject.toml
├─ README.md
collection_deployer_helper.py: Handles requests to the Compute.build server to build and deploy the collection. in order to build and deploy the collection.main.py: The script you'll use to deploy the collection.pyproject.toml: Declares the tool's dependencies;uv runinstalls them automatically.README.md: Instructions for using the tool.
Usage
The main script you'll run is main.py. When running the script, you'll need to supply some input parameters:
Required Arguments:
--collection_path: The root path to the app collection.--api_key: Your API key. See here for instructions on creating a new API key.--app_collection_uuid: The uuid of the app collection you want to deploy. To find your app collection's uuid, go to the Compute.build platform > Settings > Profile, and check the uuid of the collection you want to deploy.
Optional Arguments:
--url: The Compute.build API Url: Defaults tohttps://api.compute.build. We don't recommend changing this value.--max_timeout: Maximum time (in minutes) to wait for the action to complete. Default is2(the maximum allowed is5minutes).
Here's an example on how you can run the script from a terminal:
uv run --project tools/collection_deployer python tools/collection_deployer/main.py \
  --collection_path . \
  --api_key YOUR_API_KEY_HERE \
  --app_collection_uuid YOUR_COLLECTION_UUID \
  --max_timeout 3
The script will exit with code 0 if the deployment is successful. Otherwise, it'll exit with code 1 and display
an error message.
Examples
GitHub Actions
Below is an example of automatically triggering the deployment of a collection using GitHub Actions.
Tip
If you're new to GitHub Actions, check out the quickstart guide for an overview.
- Make sure you've the tool (download link) and extracted it into your
collection folder. Your app folder structure should look something like this:
<name-of-app-collection>/ ├── collection_requirements.yaml ├── tools │ ├── collection_deployer │ │ ├── collection_deployer_helper.py │ │ ├── main.py │ │ ├── README.md │ │ └── requirements.txt ├── apps │ ├── ... ├── shared │ └── ... └── typings - Create a
.githubfolder in the root directory of your collection. Inside this folder, create aworkflowsdirectory. Then, create a file calleddeploy_collection.yamlwithin theworkflowsdirectory.<name-of-app-collection>/ ├── .github │ ├── workflows │ │ ├── deploy_collection.yaml ├── collection_requirements.yaml ├── ... - Copy the following into your
deploy_collection.yamlfile:name: Deploy App Collection on: push: branches: - main jobs: deploy: runs-on: ubuntu-latest name: Deploy App Collection defaults: run: working-directory: . steps: - uses: actions/checkout@v4 with: submodules: true lfs: false - name: Install uv uses: astral-sh/setup-uv@v7 - name: Deploy App Collection env: PYTHONUNBUFFERED: 1 run: | uv run --project tools/collection_deployer python tools/collection_deployer/main.py \ --collection_path . \ --api_key ${{ secrets.YOUR_API_KEY }} \ --app_collection_uuid ${{ vars.COLLECTION_UUID }}
Danger
Important Note: Never paste your API keys directly into the GitHub workflow! Doing so will commit it to
your git history, which means anyone with access to your repository could see your key.
Instead, use secrets
Tip
To avoid hardcoding static variables in the GitHub workflow, consider setting them up as Action Variables. This way, if you ever need to change a value, you can do it directly in your GitHub repository settings.
To run the workflow, simply push to the main branch.
You can check the status of the deployment in the GitHub repository's Actions tab.
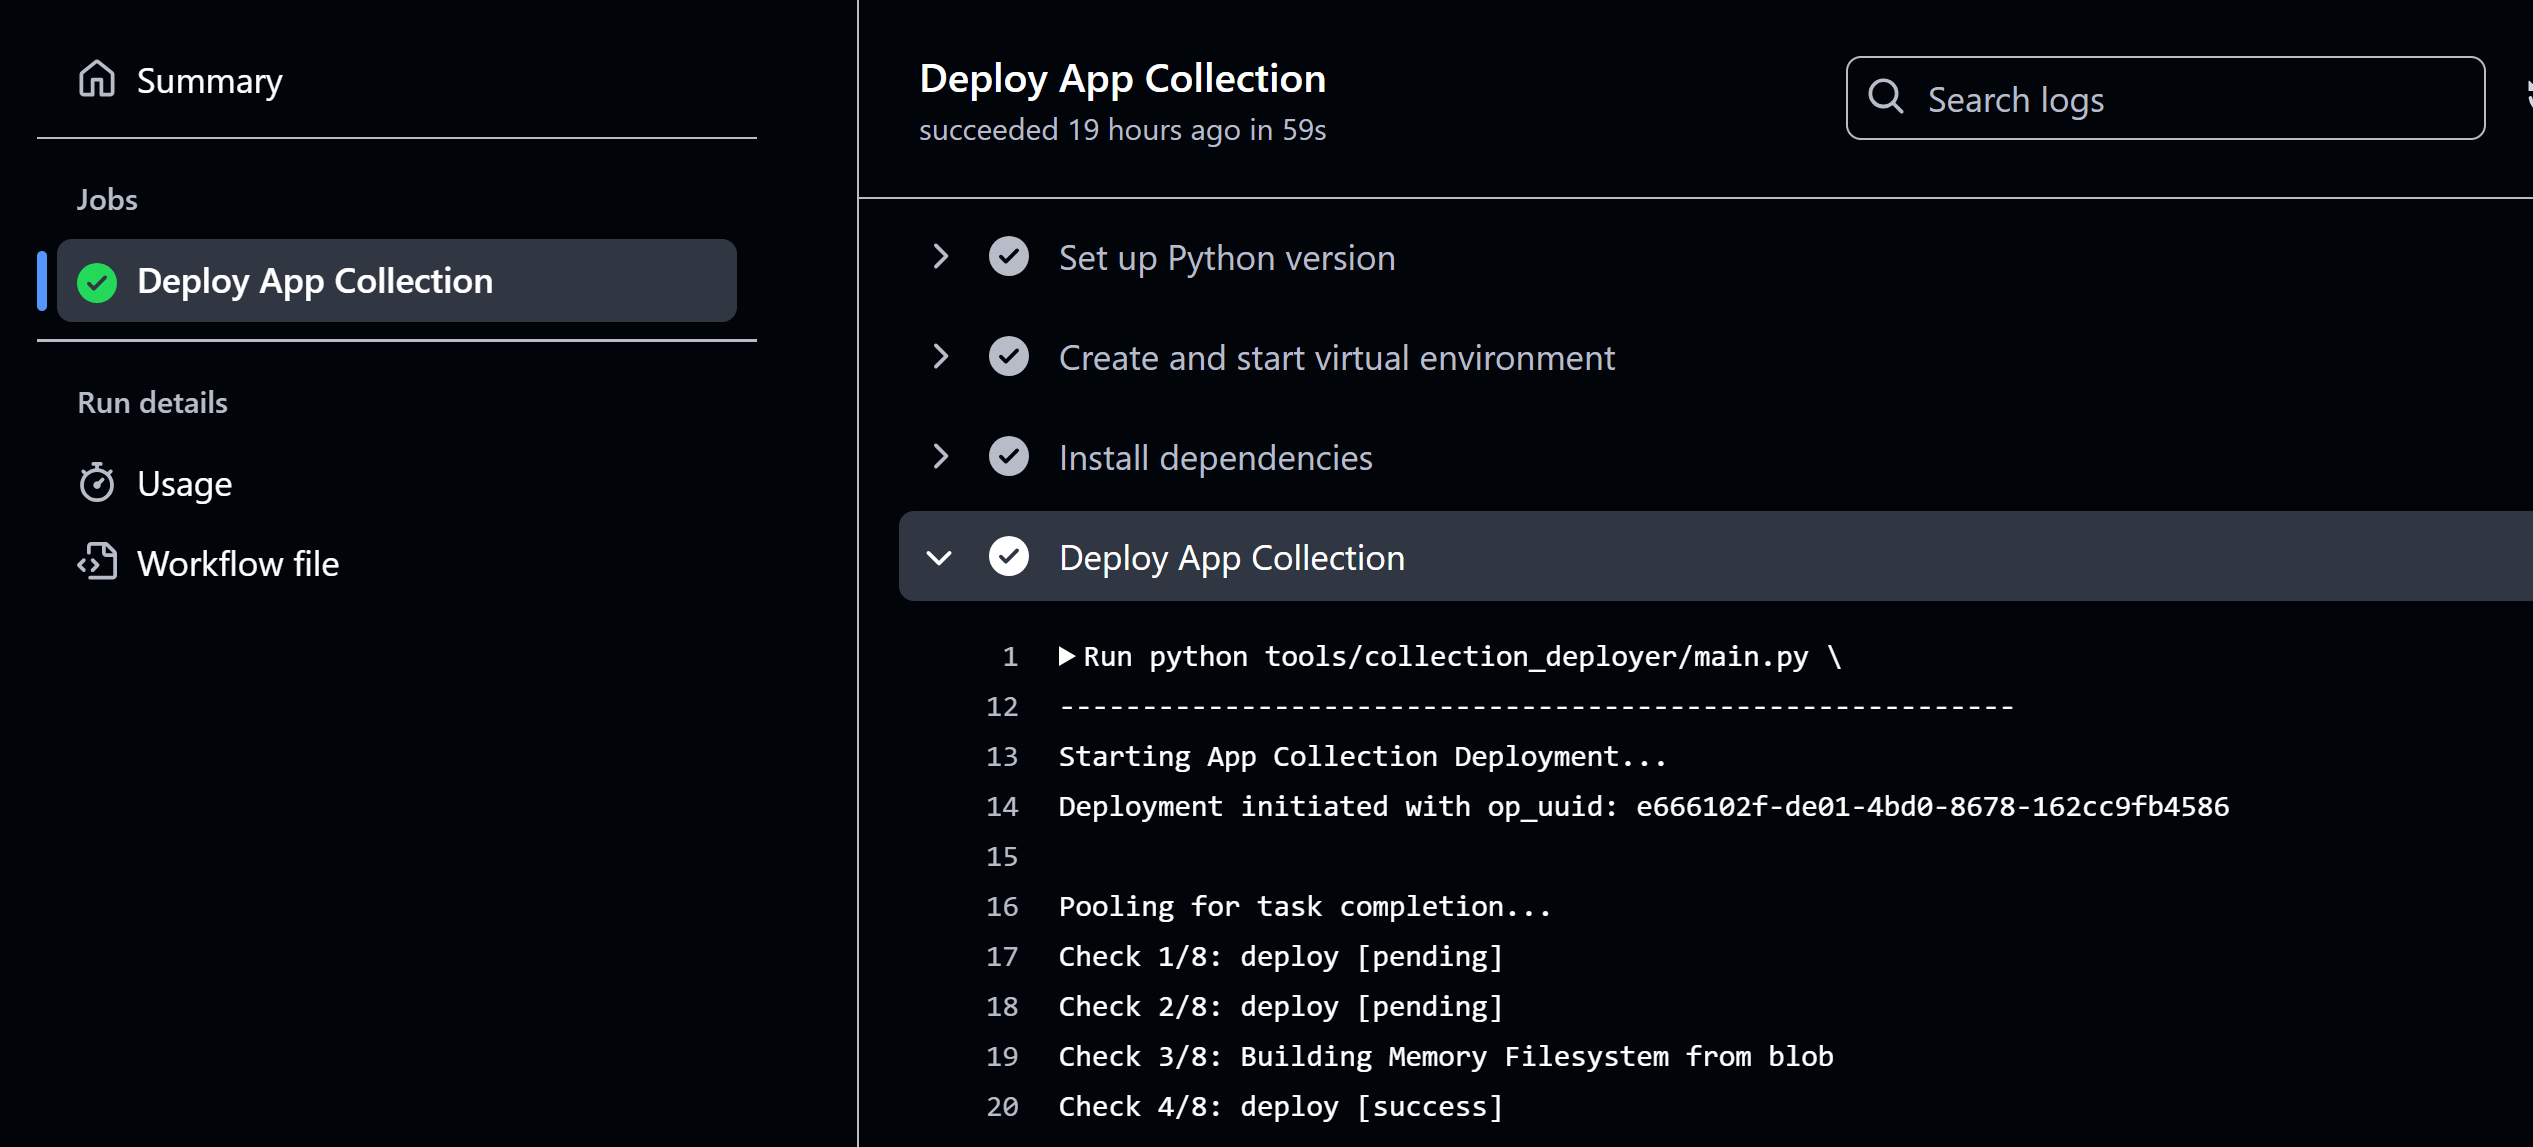
If there's an error, the deployment will fail and display an error message. Otherwise, your app collection will be automatically deployed to the Compute.build servers.
Tip
In this example we've triggered the workflow on a push to main. Ideally, you'd want to trigger it after
a pull request is approved. Check out this article
for more details on triggering GitHub workflows.